
💕
文章封面来自殘夜 ZANYA-🌟
What is traefik?
引用官方的一句话:
Traefik is an open-source Edge Router that makes publishing your services a fun and easy experience. It receives requests on behalf of your system and finds out which components are responsible for handling them.
简单来说Traefik就是一个"路由器",一个"网关",将所有指定的请求分发到对应的后端服务中,与nginx相似
官方网站:https://doc.traefik.io/traefik/
本站也是使用traefik进行路由转发,下文主要根据笔者自己的实践来介绍traefik和treafik在kubernetes中的的相关使用,由于我的traefik是机器上kubernetes集群(K3S)默认安装的,这里具体就不介绍相关安装的方法,安装方案可以参考官网
What’s Happening to the Requests?
首先引用几张官方架构图,来介绍一下treafik的一些细节

参考上图,traefik接收请求首先需要ENTRYPOINTS,通过"入口"接收所有的请求,entrypoints一般有两类,web(80)和websecure(443)分别对应http的所有请求和https的所有请求
在经过"入口"之后,请求会到ROUTERS阶段,这里主要就是执行用户定义一些路由规则,将符合用户定义的路由规则的请求最后转到到SERVICES中,这里SERVICE就是我们实际的提供服务的地址了
举个例子,当访问 http://blog.lkarrie.com (前提域名dns指向你的服务器)时,由于他是http经过80端口,所以它通过我们所定义的web entrypoints到routers,在router中存在规则,当请求host地址匹配 blog.lkarrie.com时,将请求转发至 1.2.3.4:1111,通过规则匹配,最终我们外部域名的请求会访问到我们实际后端提供服务的地址 1.2.3.4:1111(在kubernetes中,traefik配置时的service即对应kubernetes的service资源)
想了解官方对这部分的介绍可以参考:https://doc.traefik.io/traefik/routing/overview/

在ROUTER阶段,除了有规则匹配之外,还有MIDDLEWARE资源对请求进行一些自定义的处理,当我们有一些需求单纯进行路由匹配无法满足的时候,就会用到这个“filter”
使用到middleware的场景还是挺多的,本站就用,比如http跳转https,www跳转到非www(https://www.lkarrie.com跳转到 https://lkarrie.com )等等
所有middleware的类型都是trarfik为我们提供好的,例如http跳转到https的类型的middleware的类型被规定为属于 redirectscheme,处理 www跳转到无www域名的middleware属于 redirectregex
所有middleware的类型和功能列表如下:
| Middleware | Purpose | Area |
|---|---|---|
| AddPrefix | Adds a Path Prefix | Path Modifier |
| BasicAuth | Adds Basic Authentication | Security, Authentication |
| Buffering | Buffers the request/response | Request Lifecycle |
| Chain | Combines multiple pieces of middleware | Misc |
| CircuitBreaker | Prevents calling unhealthy services | Request Lifecycle |
| Compress | Compresses the response | Content Modifier |
| ContentType | Handles Content-Type auto-detection | Misc |
| DigestAuth | Adds Digest Authentication | Security, Authentication |
| Errors | Defines custom error pages | Request Lifecycle |
| ForwardAuth | Delegates Authentication | Security, Authentication |
| Headers | Adds / Updates headers | Security |
| IPWhiteList | Limits the allowed client IPs | Security, Request lifecycle |
| InFlightReq | Limits the number of simultaneous connections | Security, Request lifecycle |
| PassTLSClientCert | Adds Client Certificates in a Header | Security |
| RateLimit | Limits the call frequency | Security, Request lifecycle |
| RedirectScheme | Redirects based on scheme | Request lifecycle |
| RedirectRegex | Redirects based on regex | Request lifecycle |
| ReplacePath | Changes the path of the request | Path Modifier |
| ReplacePathRegex | Changes the path of the request | Path Modifier |
| Retry | Automatically retries in case of error | Request lifecycle |
| StripPrefix | Changes the path of the request | Path Modifier |
| StripPrefixRegex | Changes the path of the request | Path Modifier |
| Middleware | Purpose | Area |
|---|---|---|
| InFlightConn | Limits the number of simultaneous connections. | Security, Request lifecycle |
| IPWhiteList | Limit the allowed client IPs. | Security, Request lifecycle |
在K3s、Rancher中使用Treafik的正确姿势
下面就主要就是本站相关的traefik使用,由于我是服务器使用的是K3S,treafik作为了默认的ingress解决方案这里就不做安装的介绍了、除此以外Rancher 自然也少不了,Rancher中的均衡负载功能其实就是创建traefik的相关路由、但我个人并不推荐从页面上直接创建均衡负载、因为页面上创建均衡负载没有办法对路由条件进行 add 或者 or的并列运算、或者添加创建middleware对路由进行自定义的调整(官方的介绍可以在页面上通过注解标签的形式做到灵活配置,可惜在我测试过程中并不能生效),所以这里还是推荐直接通过yaml的形式直接创建相关资源
首先暴露traefik web端口,通过暴露dashboard查看我们的traefik资源情况
访问地址:http://ip:nodeport/dashboard/#/


下面就是编写yaml的过程了,这里拿本站相关的yaml配置举例
HTTP
web-blog.yaml
创建名为blog的IngressRoute,entryPoints指定为http请求对应80端口的 web entryPoint,
路由配置规则为 满足 blog.lkarrie.com 或 www.blog.lkarrie.com 的host地址
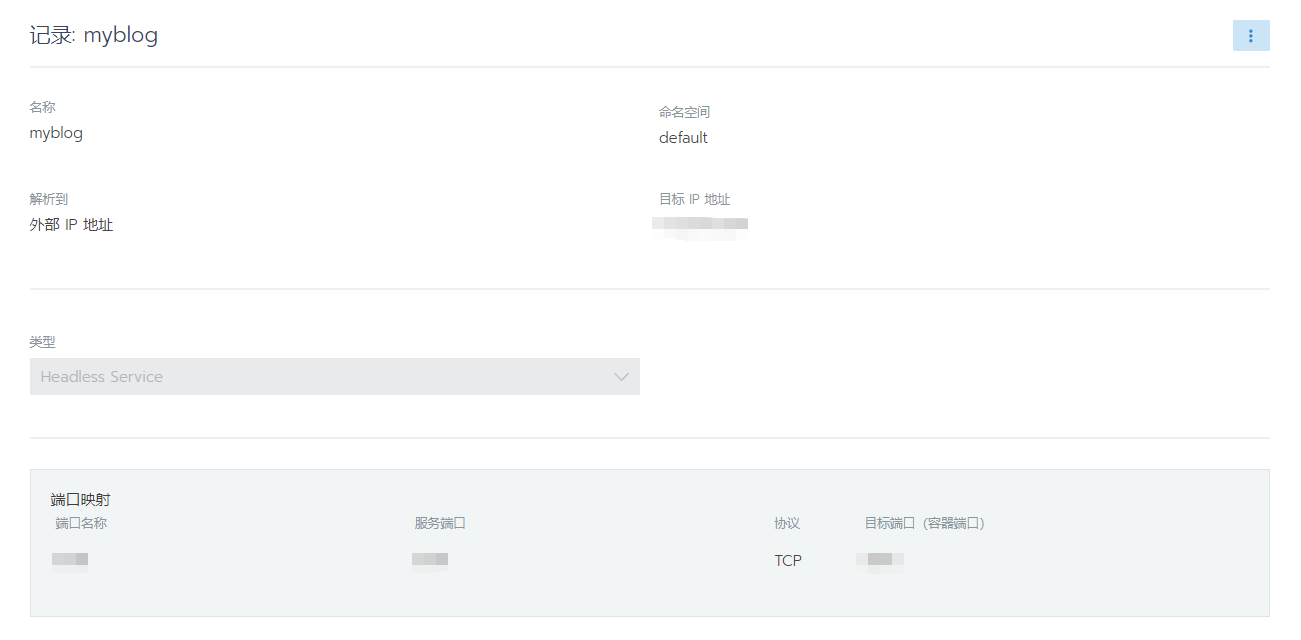
匹配相关规则后,请求转发到名为myblog的service资源,端口指定为1111(由于我的后台服务并不是直接使用工作负载跑在的集群中,而是在集群外部使用docker运行的,所以这里创建外部IP和端口的service连接到blog服务)
最后指定了链路中需要使用的两个middleware分别名为redirect-https-middleware、blog-redirectregex
apiVersion: traefik.containo.us/v1alpha1
kind: IngressRoute
metadata:
  name: blog
spec:
  entryPoints:
  - web
  routes:
  - match: Host(`blog.lkarrie.com`) || Host(`www.blog.lkarrie.com`)
    kind: Rule
    services:
      - name: myblog
        port: 1111
    middlewares:
    - name: redirect-https-middleware
    - name: blog-redirectregex
redirect-https-middleware.yaml
通过这个中间件强制使http的请求跳转为https
apiVersion: traefik.containo.us/v1alpha1
kind: Middleware
metadata:
  name: redirect-https-middleware
spec:
  redirectScheme:
    scheme: https
    permanent: true
http-blog-redirectregex.yaml
通过这个中间件修改http带有www的请求地址,跳转到http非www的地址中
apiVersion: traefik.containo.us/v1alpha1
kind: Middleware
metadata:
  name: blog-redirectregex
spec:
  redirectRegex:
    regex: ^http://www.blog.lkarrie.com/(.*)
    replacement: http://blog.lkarrie.com/${1}
HTTPS
websecure-blog.yaml
创建名为httpsblog的IngressRoute,entryPoints指定为https请求对应443端口的 websecure entryPoint,
路由配置规则为 满足 blog.lkarrie.com 的host地址
匹配相关规则后,请求转发到名为myblog的service资源,端口指定为1111
apiVersion: traefik.containo.us/v1alpha1
kind: IngressRoute
metadata:
  name: httpsblog
  namespace: default
spec:
  entryPoints:
  - websecure
  routes:
  - match: Host(`blog.lkarrie.com`)
    kind: Rule
    services:
      - name: myblog
        port: 1111
  tls:
    secretName: blog
websecure-wwwblog.yaml
创建名为httpswwwblog的IngressRoute,entryPoints指定为https请求对应443端口的 websecure entryPoint,
路由配置规则为 满足 www.blog.lkarrie.com 的host地址
匹配相关规则后,请求转发到名为myblog的service资源,端口指定为1111
指定了链路中需要使用的名为https-blog-redirectregex的middleware
最后指定了https访问需要的证书(这里证书就是密文属于K8S的资源,可以在系统中添加后直接被引用,
注意有命名空间的要求,证书需要在所属的命名空间下)
apiVersion: traefik.containo.us/v1alpha1
kind: IngressRoute
metadata:
  name: httpswwwblog
  namespace: default
spec:
  entryPoints:
  - websecure
  routes:
  - match: Host(`www.blog.lkarrie.com`)
    kind: Rule
    services:
      - name: myblog
        port: 1111
    middlewares:
    - name: https-blog-redirectregex
  tls:
    secretName: wwwblog
如果你是 泛域名SSL证书 就没必要像我一样 由于我是单域名证书(免费的)所以需要逐个上传

https-blog-redirectregex.yaml
通过这个中间件修改https请求带有www的请求地址,跳转到https非www的地址中
apiVersion: traefik.containo.us/v1alpha1
kind: Middleware
metadata:
  name: https-blog-redirectregex
spec:
  redirectRegex:
    regex: ^https://www.blog.lkarrie.com/(.*)
    replacement: https://blog.lkarrie.com/${1}
    permanent: true
至此一个完成的域名转发配置基本实现了
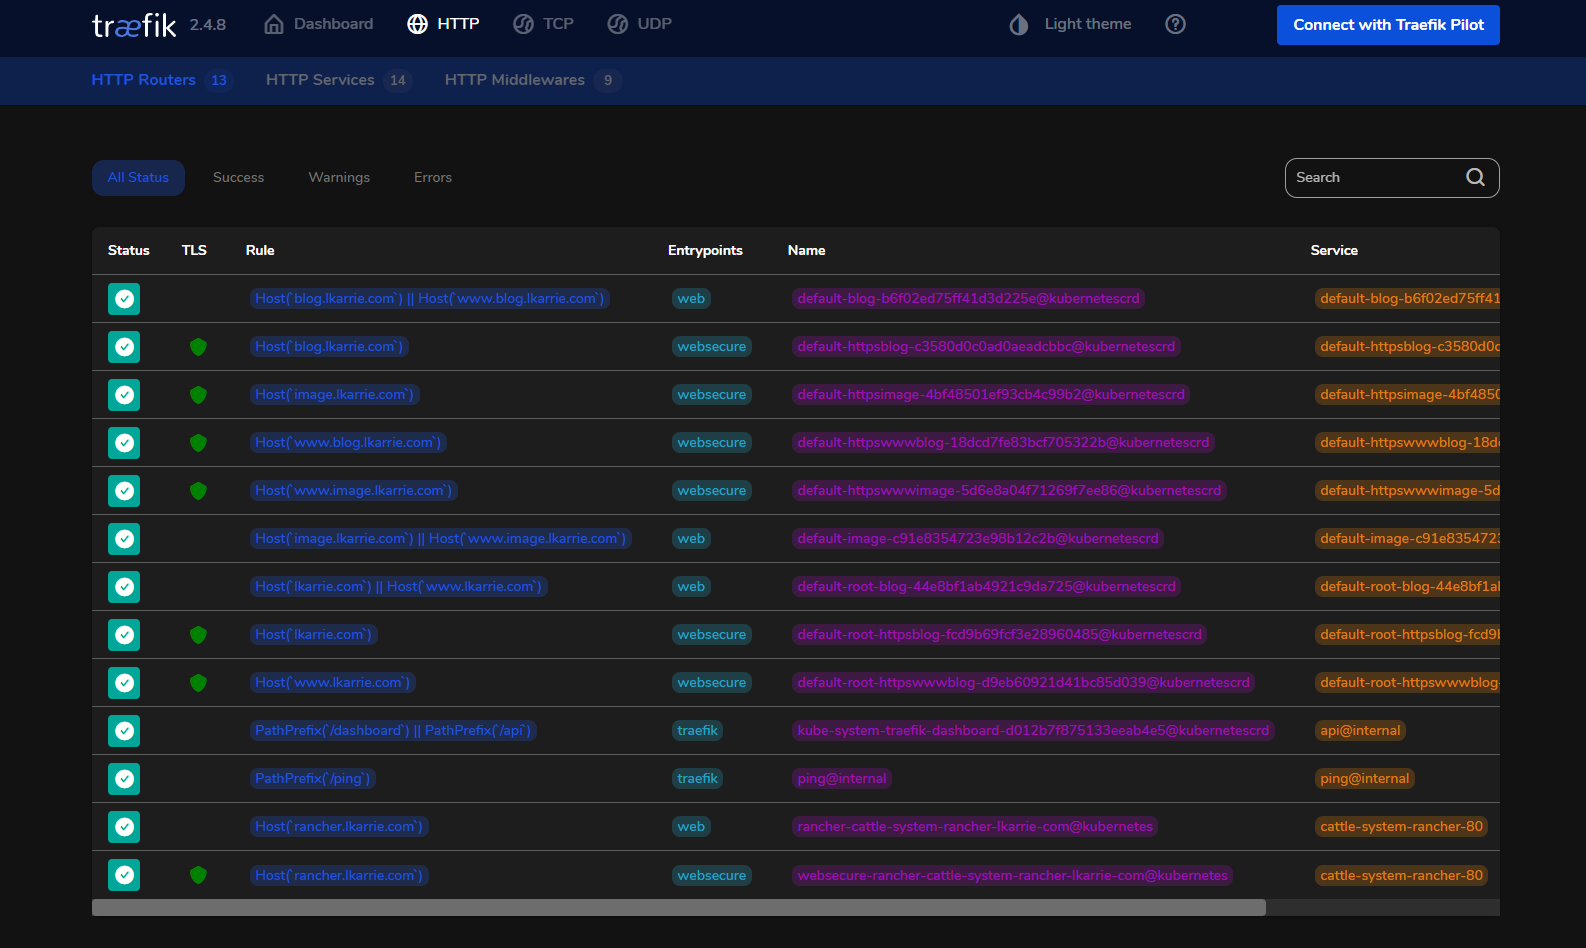
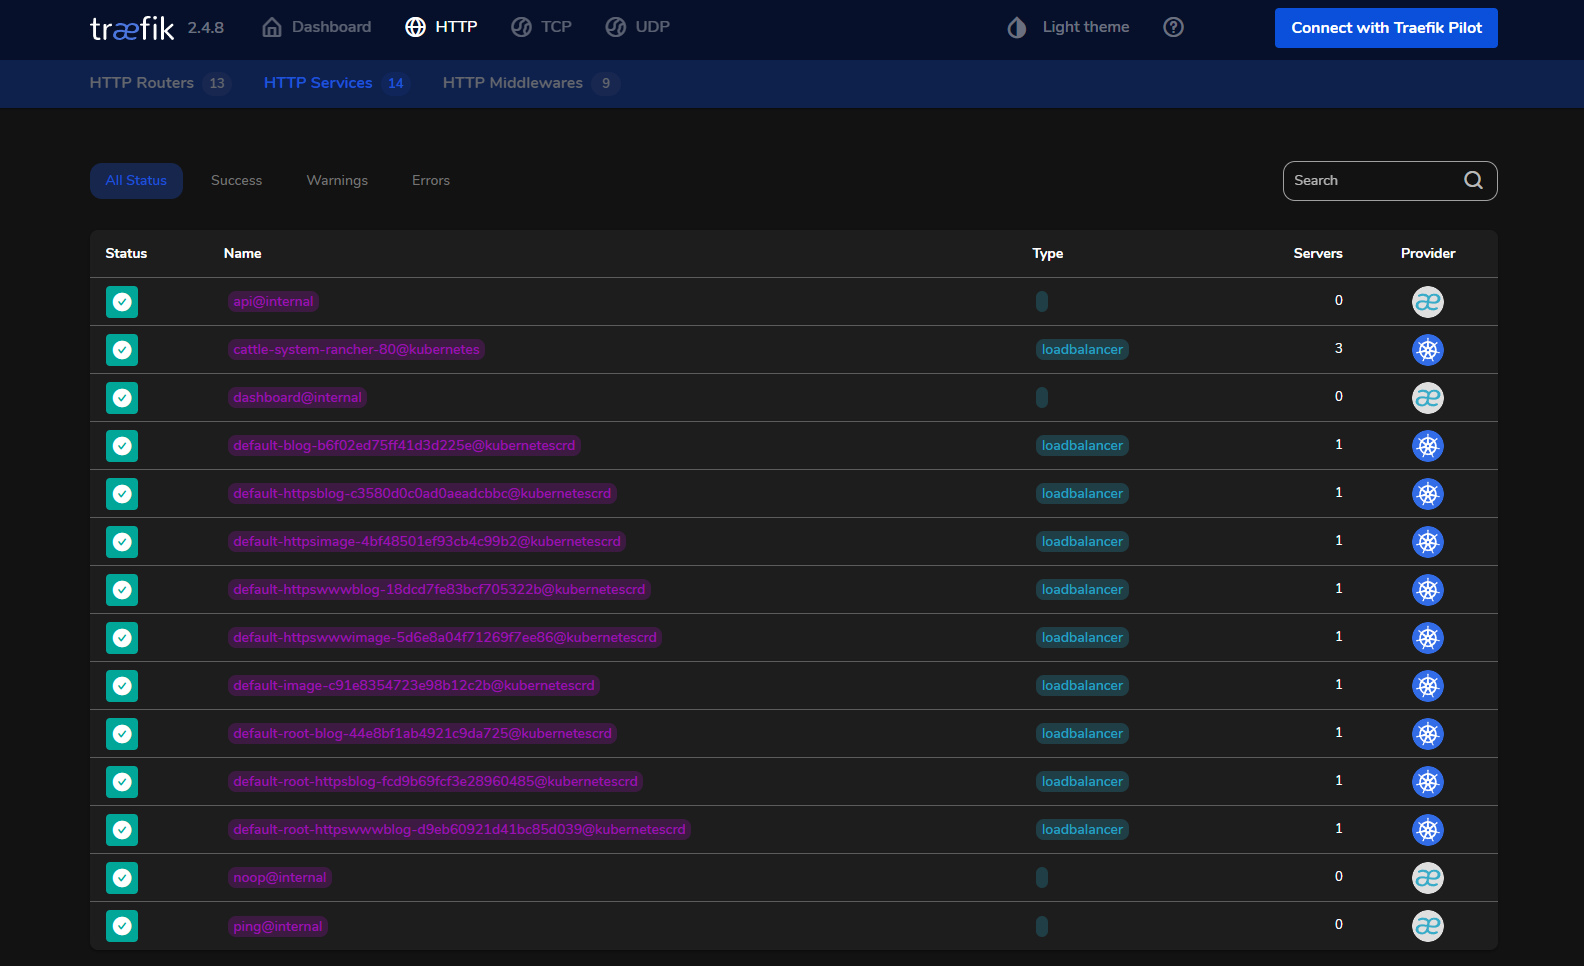
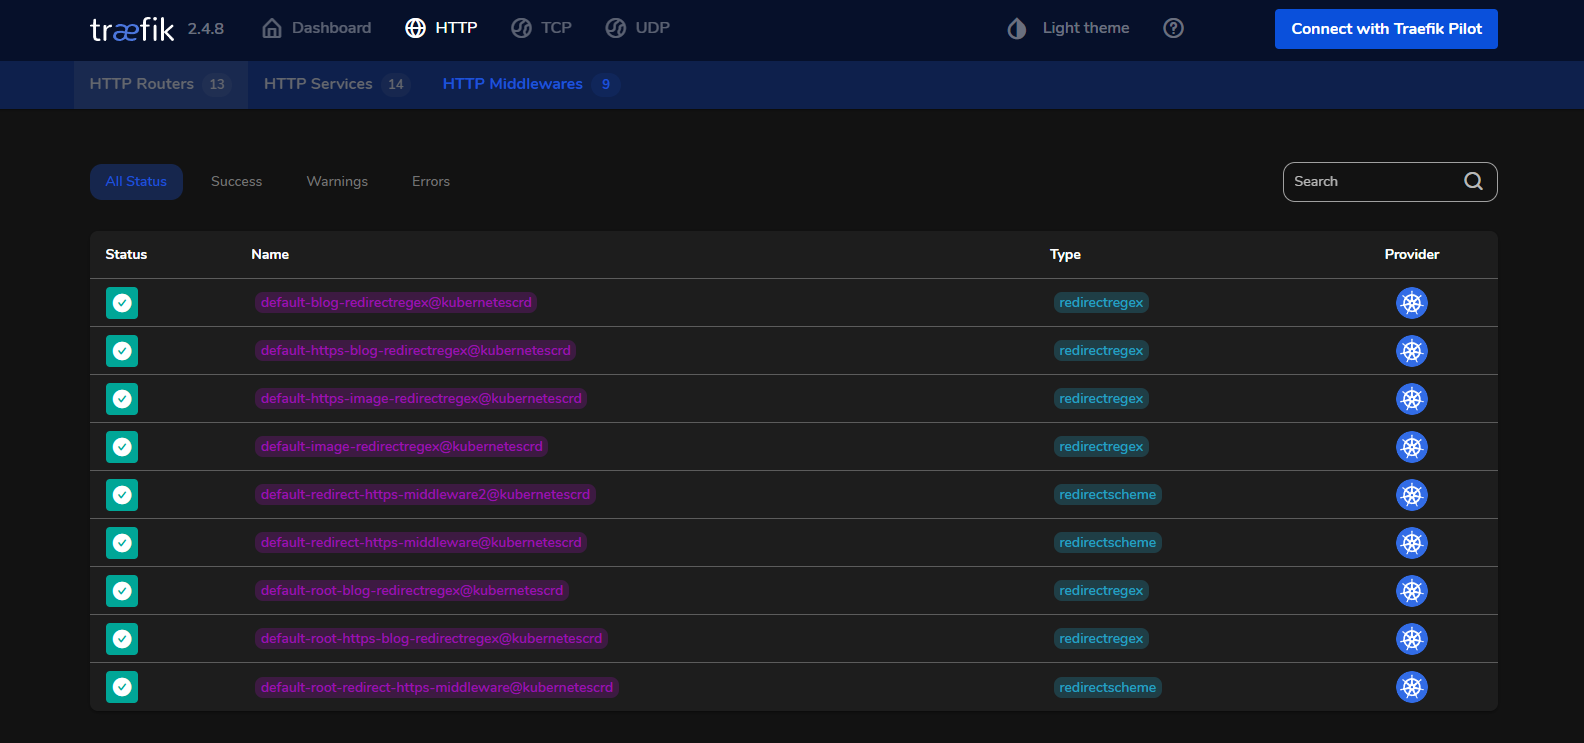
创建完之后可以在你的trarfik dashboard中查看你创建的资源(由于我还创建了一些别的网站转发规则,比如根域名和图床的地址转发,所以截图中比较多,创建的方法类似于上述的yaml就不再详细贴上相关yaml了)
用起来之后确实感觉比ng方便许多,真不戳 :D